How to adjust your "laser bubble-level", step by step
1) If you dont have one,
borrow few minute a "reference bubble level" (also known as a "spirit level"). With a precision of 0.5 mm/m (such as the "laser bubble-level") or better – 0.2 mm/m if possible – because the "reference" must be a tad better than what you would like to adjust:

2) As above: choose a floor that is absolutely flat and leveled properly, like a marble floor or something (such as in the departement stores, for example...).
3)
You can check if it's really flat, by doing the first measure with your "reference bubble-level",
to obtain that the bubble stick exactly in the middle between the two benchmarks. For examples:


— then turn your "reference bubble level" by 180°... exactly in the SAME location:
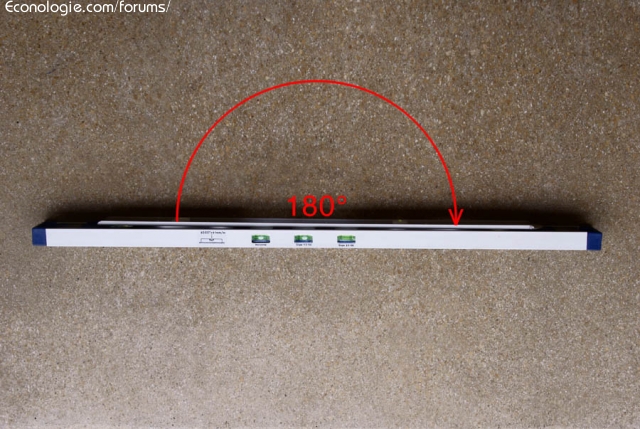
— if the bubble continue to stay in the middle, such as here:

... you can be sure, that the floor is flat.
If not, you must change the place until you find a new place that provide same measure (bubble in the center) exactly in the SAME location: again try it, up side down by 90°, 180° (or whatever... everything you can try...).
(Caution: keep in mind that a "reference bubble-level" can be wrong also! Because of a temperature differences or something... Reason why it's necessary to check it also!)
So be carefull, and if you think something go wrong, don't hesitate to change it, for take a try with another one).
4) When you already find the right place that show the bubble in the middle (two times) with your "reference bubble level",
you are ready to check your "laser bubble-level". You can just put it on the floor (don't use a tripod to adjust) closer to your "reference bubble-level" (exactly in the same place):

... so, you are ready to check the "laser bubble-level" (by the same way) by
comparing with your "reference bubble-level":

5) Then
turn your "laser bubble-level" by 180° (but not the "reference bubble-level"):

6)
If the bubble stay AGAIN, exactly in the middle you win ! Your level is leveling: well done!
7)
If not like here (and before turning by 180° again):

...
you must adjust your "laser bubble-level":

...
by using one of theses small screws:
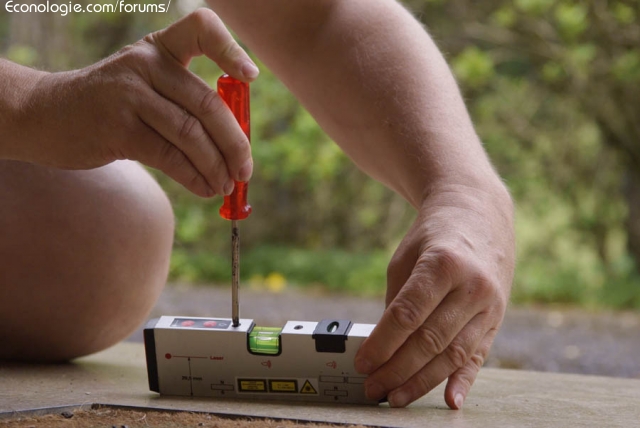
8}
To adjust, you must doing that on the floor, in the same place of your "reference bubble-level": to compare of course...:

9) Turning the screw a tad (one of them) until the bubble stay exactly in the middle, like here:
... Then, you must turn again by 180° also, to check it again TWO TIMES. Until you are 100% sure about of your laser equipement. But it's easy, because it have two bubble units, and both must be in the middle when checking.
It's possible that you notice a short difference immediately from the step #4 (above) then you need to adjust the level a tad from the first try. This is sometimes because the temperature difference etc... For this reason, you must check your laser bubble-level every times before using it. And sometimes it dosen't match from the first. But sometimes yes: this is normal for a picky equipment!
For training: Here a video:
http://www.youtube.com/watch?v=JDrZLEyGFL8
... that suggest another similar way to do. But unfortunately, by this method you CAN NOT turn all to 180°... So I prefeer the method above to be sure. But that can give you some idea about this.
But as reported by this film, aligning the laser to the opposite, with a second bubble-level (in the field) it's a very good idea...
So go onsite, in the field for leveling your house!
10) Try to find a tripod for photography. Your "laser bubble-level" is adapted to be screwed on it (same standard diameter of the screw).
11) Then you must use the "bubble level" for targeting your house, but first of all:
— you need to adjust the horizontal "laser
bubble-level", by using the horizontal bubble (as reported on the video above).
— then you must "plumb" by the same way, but using the vertical bubble:

Take a look to this video, to know how to "plumb", by another explanation:
http://www.youtube.com/watch?v=s1uG9Ds18tQ
So, you can use the vertical bubble AND/OR a vertical reference line that can help, for example: targeting some antenna behind your house or better: use a plumb-bob:

... and compare the vertical laser line with the string attached to the plumb (but you must be sure that your reference line is not biased, of course).
Then, after that, you can turn step by step until 360°, and it must be show the same level and perfect allignment with the vertical line (and the horizontal bubble, must be centred all the time, of course).
Now it's ready to leveling the house!
In the case of this thread, I recommand also, that the owners of the house leveling from inside, using the promenade that turn around the house.